
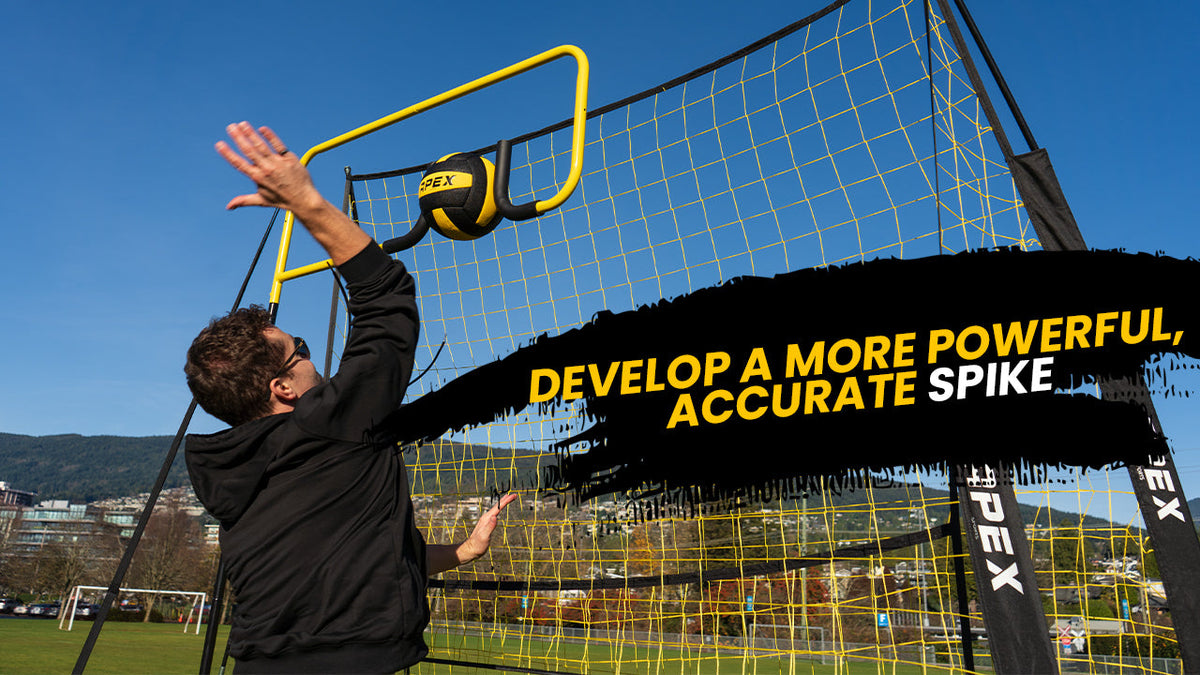
Volleyball spike training is where matches are actually won and lost. A hitter who can only swing hard in one direction is easy to defend — good blockers and back-row defenders start cheating toward the obvious shot the moment they spot a predictable arm swing. The players who consistently score are the ones who've drilled both power and placement until the choice between a crosscourt rip and a soft tip off the block is automatic, not something they're figuring out mid-approach. This guide covers why so many hitters plateau, the drills that fix it, and a four-week progression you can run to build a more complete attack.
The Problem: Hitters Who Are Strong But Not Consistent
Most attacking errors don't come from a lack of raw ability. They come from inconsistency in the parts of the swing that happen before contact — approach timing, arm path, and shoulder rotation — which means the same player can crush a ball down the line on one rep and sail it long on the next. Coaches see this constantly: a hitter has all the vertical and all the arm speed in warmups, but that power doesn't translate into controlled, repeatable kills once a live set and a blocker are added to the equation.
Three issues show up most often. First, approach footwork breaks down under pressure, so the hitter arrives at the ball off-balance and compensates with an arm-only swing that sacrifices both power and control. Second, players rely on strength instead of full-body mechanics — a swing driven by the shoulder alone will never generate the racket-like snap that a properly sequenced hip-to-wrist chain produces. Third, and most commonly overlooked, hitters simply don't get enough live-speed reps. Team practice time is split across an entire roster, so an individual hitter might get 15–20 real approach-and-swing reps in a two-hour session — nowhere near enough volume to groove a swing that holds up in a five-set match.
The fix isn't more general "hitting practice." It's isolating the specific mechanical breakdowns — approach, arm path, contact point, and shot placement — and drilling each one with enough repetition that the correct pattern becomes the default, even when a player is tired or under pressure.
The Solution: Mechanics-First Drills That Build Both Power and Placement
The drills below separate spike training into its component parts so a hitter can fix a weak link without having to relearn the whole swing at once. Run through all five for a complete session, or isolate one or two on lighter practice days.
1. Three-Step Approach Timing (No Ball)
Purpose: Groove the footwork pattern that sets up every powerful swing, before adding the variable of contact.
How it works: Mark your approach with tape or cones — left-right-left for a right-handed hitter, right-left-right for a lefty. Walk through it slowly first, then build to game speed, focusing on the accelerating rhythm: short step, medium step, long final step into the plant.
Reps: 4 sets of 10 approaches, alternating which foot leads on the final plant.
Coaching cue: The steps should get longer and faster as you go — a same-length approach kills the elastic energy you need for a full vertical jump.
2. Solo Spike Trainer Full-Swing Reps
Purpose: Build a repeatable, full-speed arm swing without needing a setter to feed you live balls.
How it works: A volleyball spike trainer suspends the ball at a fixed, adjustable height so you can run your full approach and hit through it at game speed on every rep. Because there's no ball chasing between reps, you can string together dozens of full-intensity swings in a single set — which is exactly the repetition volume that live drilling can't provide.
Reps: 6 sets of 8 full approach-and-swing reps, resting 30–45 seconds between sets to protect swing speed.
Coaching cue: Lead the swing with your elbow, not your hand — a high elbow creates the whip-like path that generates power without extra muscular effort.
3. Target Zone Placement Drill
Purpose: Train shot placement so power doesn't come at the cost of accuracy.
How it works: Set up cones or towels in the deep corners and the sharp crosscourt angle of the court. Using your hitting trainer or live tosses from a partner, call out a target zone before each swing and try to land the ball inside it. Rotate through all three zones — line, crosscourt, and a soft roll shot — so you're not just grooving one shot.
Reps: 5 sets of 6 swings, two to each of the three target zones.
Coaching cue: Change your contact point, not your arm speed, to change shot direction — swinging softer to "place" a ball is what turns a hittable ball into a defender's easy dig.
4. Off-the-Net Rebound Power Drill
Purpose: Build arm speed and reactive hitting off a fast-returning ball.
How it works: Using a volleyball training system set at hitting height, drive the ball into the net at an angle so it rebounds back to you quickly, and attack the rebound immediately rather than resetting. This forces a fast read-and-react swing instead of a slow, deliberate one.
Reps: 5 rounds of 30 seconds continuous, resting 30 seconds between rounds.
Coaching cue: Keep your hitting shoulder up and ready between reps — dropping your arm between swings adds a fraction of a second you don't have in this drill.
5. Fatigue-Resistance Finisher
Purpose: Train your swing mechanics to hold up when your legs and arm are tired, which is when most in-match hitting errors happen.
How it works: After a conditioning burst — 10 tuck jumps or 20 seconds of lateral shuffles — immediately step into three full approach-and-swing reps on your spike trainer. The goal isn't perfect form under fresh legs; it's maintaining 80% of your normal mechanics when you're breathing hard.
Reps: 4 rounds of conditioning burst + 3 swings.
Coaching cue: If your plant foot starts landing flat instead of heel-to-toe, that's the first sign of fatigue breaking your mechanics — reset your focus there before anything else.
Practice Plan: A 4-Week Hitting Progression
Week 1 — Foundation. Two sessions focused on Drills 1 and 2 only. The goal is clean, repeatable mechanics before adding any complexity. Run 4 sets of the approach ladder and 6 sets of spike trainer swings each session.
Week 2 — Add Placement. Keep Drills 1 and 2, and introduce Drill 3 (Target Zone Placement) twice this week. Start emphasizing shot selection over raw power — a controlled kill to an open zone beats a hard-driven ball into a blocker's hands.
Week 3 — Add Speed and Reaction. Layer in Drill 4 (Off-the-Net Rebound Power). This is the week hitters typically notice their swing starting to feel automatic rather than deliberate — reaction speed should be improving alongside power.
Week 4 — Full Integration Under Fatigue. Run the complete five-drill sequence, finishing every session with Drill 5. This is where you find out whether the mechanics built over the previous three weeks actually hold up late in a long practice or a five-set match — which is exactly the condition they need to survive in games.
Log your target-zone accuracy percentage each week (Drill 3) as your primary progress metric. Power is relatively easy to build; the real marker of a developing hitter is whether accuracy holds steady or improves as intensity and fatigue increase.
Equipment Recommendations
The drills above work because each tool solves a specific gap in solo hitting development — reps, reaction speed, or live-net conditions — that live team practice can't provide in enough volume.
A solo volleyball trainer is the backbone of this entire progression. It's the only realistic way to get dozens of full-speed, full-approach swings in a single session without a setter feeding you balls, which makes it essential for Drills 2, 3, and 5.
For the reactive, live-net work in Drill 4, a volleyball training system that holds a consistent height and tension gives you a reliable rebound to attack, rather than an improvised setup that changes the ball's behavior every session.
If you're building a complete backyard or garage hitting station, pairing either tool with an adjustable volleyball net lets you dial in net height for age or skill level, so younger hitters can build the same mechanics at a height appropriate to their development.
Conclusion
Powerful, inconsistent hitting is a mechanics problem, not a strength problem — and it's fixable with the right sequence of drills. Isolating approach footwork, arm path, placement, reactive speed, and fatigue resistance, then integrating them over a focused four-week block, turns a hitter who's occasionally dangerous into one who's consistently hard to defend. Consistent practice with the right drills and training equipment can help players accelerate development throughout the season.

Leave a comment
This site is protected by hCaptcha and the hCaptcha Privacy Policy and Terms of Service apply.